Print and assemble a snowflake star for Christmas...hang in your window or use as a treetop ornament. Assembled size: app. 14 inches
DIRECTIONS:
1.
Print 5 copies of Star Snowflake Ornament Section on cardstock paper:
2. Cut out pattern.
3. Fold along solid lines and tab lines. Here I used a ruler and a butter knife to score the lines, to create crisp folds.
4. Each snowflake section be creased as shown. Note how all the folds are toward the blank surface of the pattern.
5. Tape or glue each section along the tab as shown.
Double stick tape works best, since there's no mess and no waiting for it to dry.
6. Once the star sections have been assembled, flatten each section as shown.
7. Align 2 sections and secure the tabs as shown.
8. Repeat with all five sections.
9. Carefully open your star like a fan, and secure the final two tabs.
Merry Christmas!
©2013 Tammy Yee.
Add Post To: |
Digg|
Technorati|
Tip'd|
del.icio.us|
Stumbleupon|
Reddit|
BlinkList|
Furl|
Spurl|
Yahoo|
Simpy|
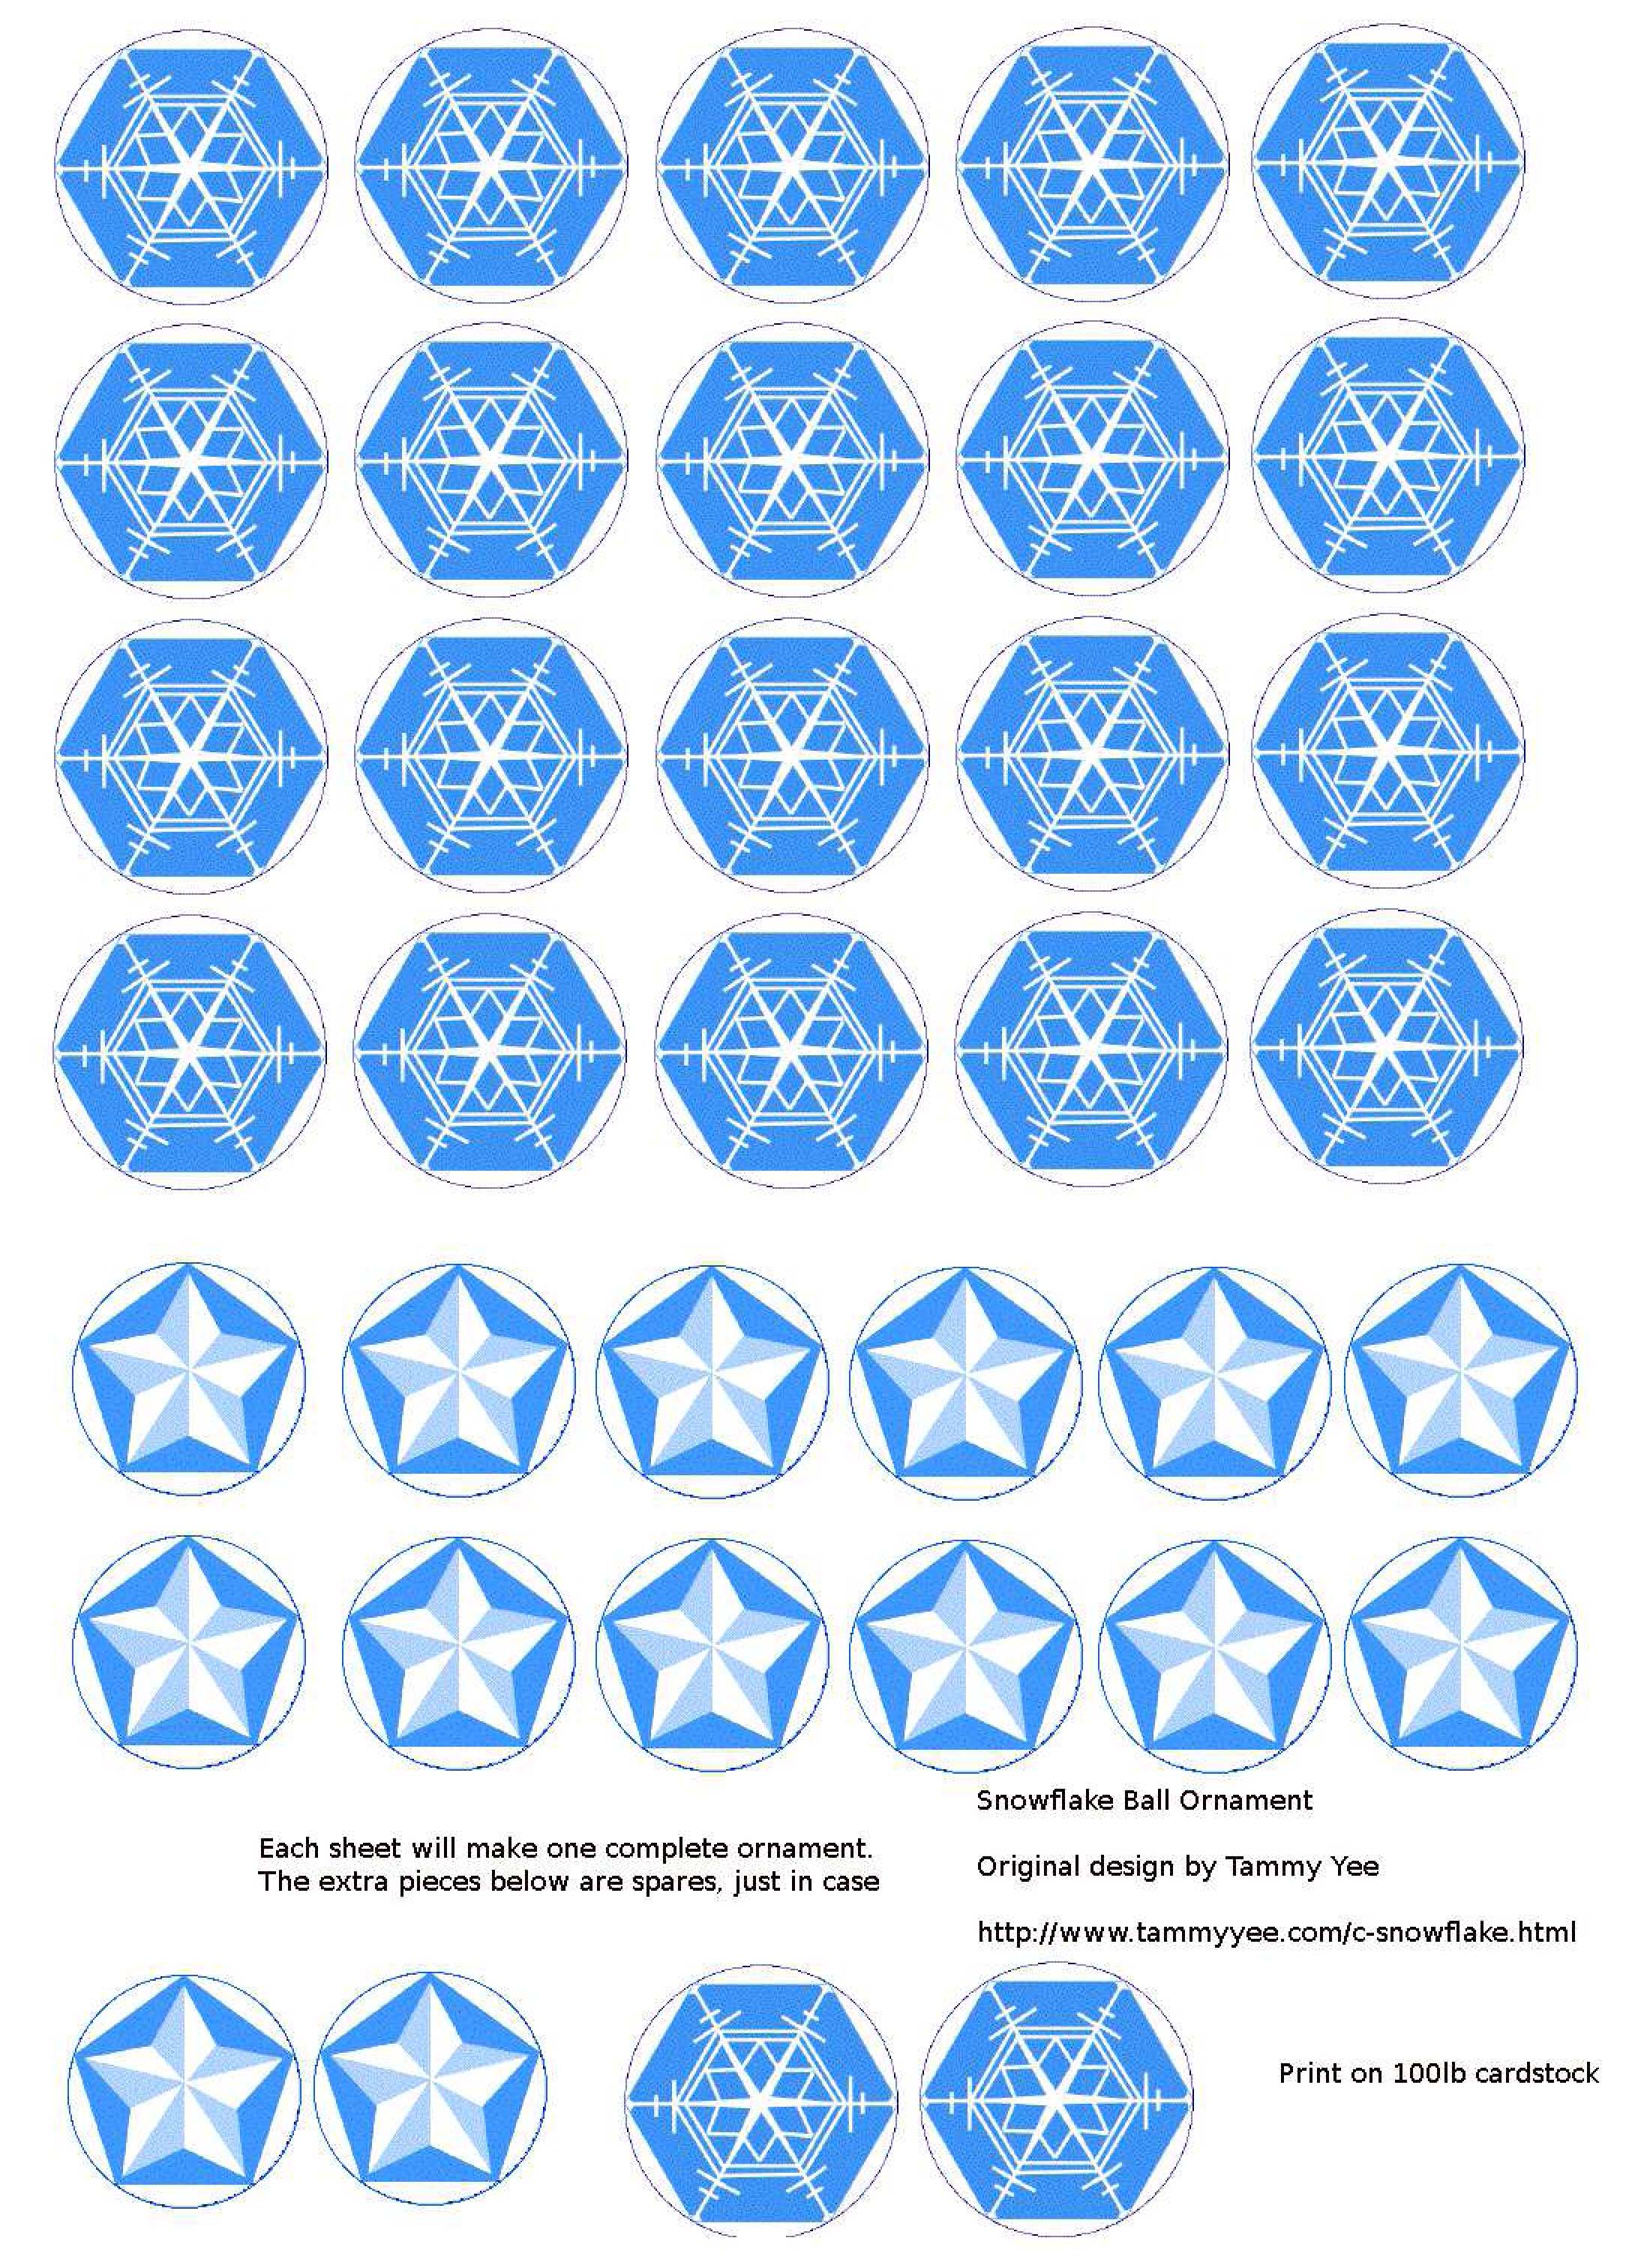
Assemble this geometric Christmas Ornament using pre-printed pentagons and hexagons.
Difficulty: Moderate
Directions:
1. Print out Snowflake Ornament pattern sheet, preferable on heavy weight or cardstock paper.
2.
Cut out hexagons and pentagons along solid, outer circle.
3a.
Prepare your pentagons by folding the white "tabs" forward as shown. Repeat on all five sides of the pentagon.
3b. Prepare your hexagons in the same manner, creating tabs by folding the white edges forward along all six sides (not shown).
4. Assemble your Christmas ornament by gluing the white tabs together, or taping the shapes together on the underside. Each pentagon should be surrounded by five hexagons. Refer to illustration of completed ornament at the top of page as needed.
©2009 Tammy Yee
All rights reserved.
Add Post To: |
Digg|
Technorati|
Tip'd|
del.icio.us|
Stumbleupon|
Reddit|
BlinkList|
Furl|
Spurl|
Yahoo|
Simpy|
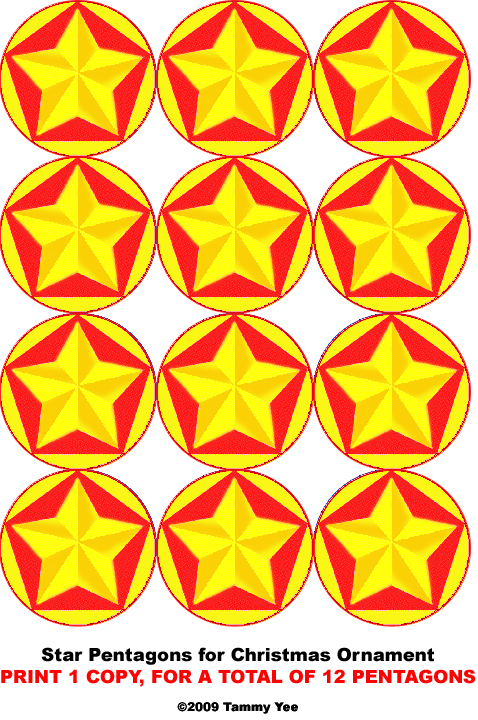
Assemble this geometric Christmas Ornament using pre-printed pentagons.
Difficulty: Moderate
Materials:
12 (1 copy) Star Pentagons
Tape or glue
Directions:
2. Cut out pentagons along solid, outer circle.
3. Prepare your pentagons by folding the white "tabs" forward as shown. Repeat on all five sides of the pentagon.
4a. Assemble your Christmas ornament by gluing the white tabs together, or taping the shapes together on the underside, so that you have half an ornament with a pentagon in the center, surrounded by five pentagons.
4b. Repeat, to make the second half of the ornament, with a pentagon in the center surrounded by five pentagons.
4c. Glue or tape the two halves together to create your Christmas Star Ornament. Refer to photo of completed ornament at the top of the page as needed.
Add Post To: |
Digg|
Technorati|
Tip'd|
del.icio.us|
Stumbleupon|
Reddit|
BlinkList|
Furl|
Spurl|
Yahoo|
Simpy|
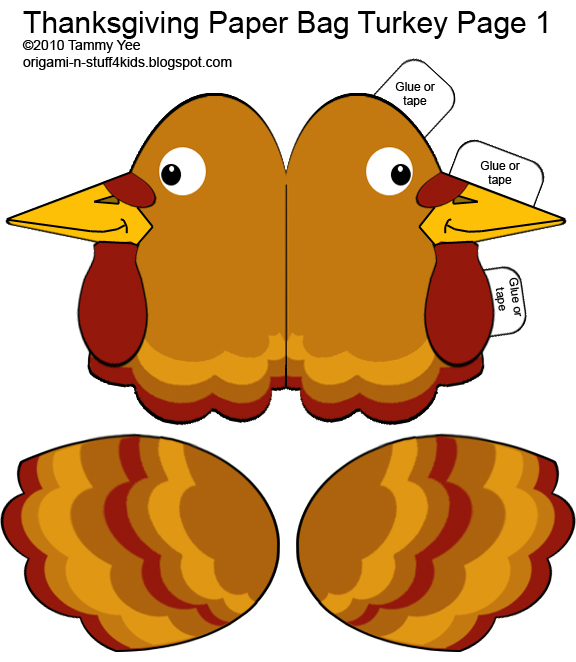
A fun and easy centerpiece children can make with a few supplies and these printable designs. Parental guidance needed.
Supplies:
1 small paper bag
scissors
glue or tape
marker
printed turkey template
Directions:
1. Stuff small paper bag with tissue paper or paper towels. Twist and seal end.
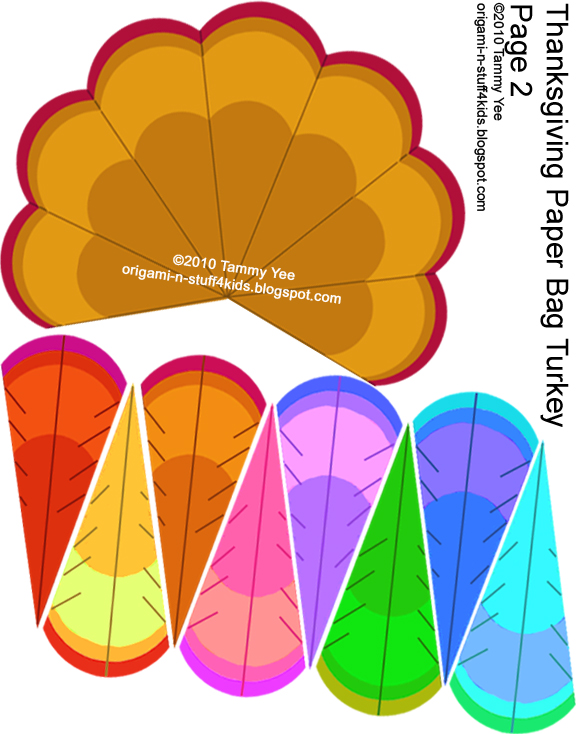
2. Print and cut out "Giving Thanks" Paper Bag Turkey Craft sheets (2 pages).
3. Assemble head by taping or gluing tabs, then cover sealed end of paper bag with paper turkey head and secure with tape or glue. (I cut a slit in the back of the head so that it fits more snugly against the paper bag body.)
4. Glue or tape turkey wings and tail to body.
5. Write down things that your children are thankful for--friends, family, health, etc.--on each feather and glue or tape onto turkey tail.
Happy Thanksgiving!
©2010 Tammy Yee
All rights reserved.
Add Post To: |
Digg|
Technorati|
Tip'd|
del.icio.us|
Stumbleupon|
Reddit|
BlinkList|
Furl|
Spurl|
Yahoo|
Simpy|
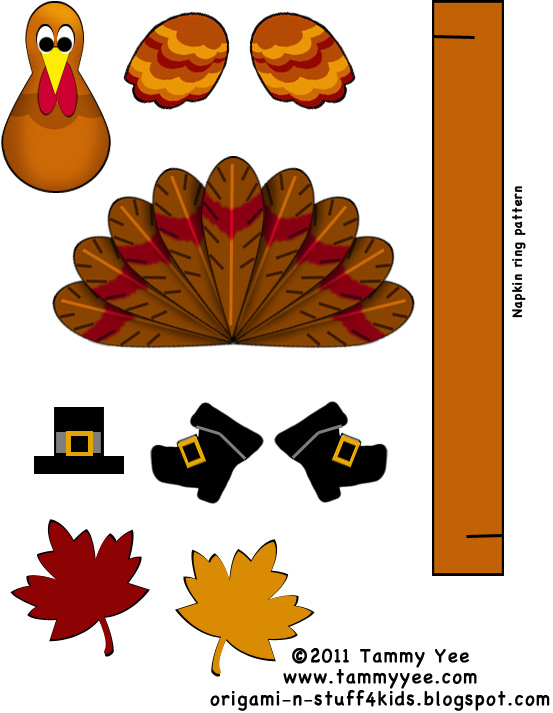
Here's a Thanksgiving Turkey to print for place cards, napkin rings and greeting cards. For place cards, use a 3"x5" blank index card, folded in half. For napkin rings, use a cardboard paper towel roll cut into 1" lengths, OR use the printed pattern. For Thanksgiving greeting cards, fold a blank letter-sized paper in half and decorate.
©2011 Tammy Yee
All rights reserved.
Add Post To: |
Digg|
Technorati|
Tip'd|
del.icio.us|
Stumbleupon|
Reddit|
BlinkList|
Furl|
Spurl|
Yahoo|
Simpy|
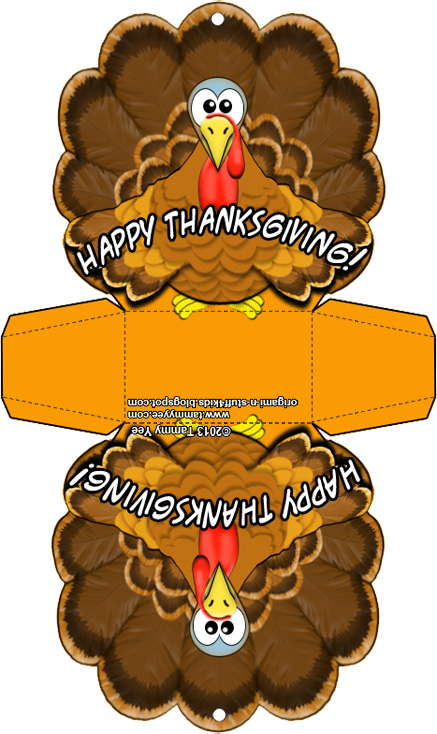
Print and fold a Thanksgiving Turkey Gift Bag.
Directions:
Print on hard card stock. Cut out on outer lines, fold on dashed lines and secure with glue or tape. Punch holes in top and add ribbon.
Happy Thanksgiving!
©2013 Tammy Yee
All rights reserved.
Add Post To: |
Digg|
Technorati|
Tip'd|
del.icio.us|
Stumbleupon|
Reddit|
BlinkList|
Furl|
Spurl|
Yahoo|
Simpy|
Copyright ©2009 Tammy Yee
All rights reserved. No portion of this web site may be reproduced without prior written consent.


